Lash Mapping – What Is It And What Does It Involve?
Not all eyelash extensions are created equal. Some look stunning and effortless, like they are meant for that face. You have probably seen the art of lashes that open up the eyes, lift the face, and somehow just work perfectly.
That’s not just a lucky lash tech. That’s lash mapping.
If you have never heard of it, don’t worry. It sounds technical, but really, it is just planning. Good, smart, thoughtful planning that makes your lash extensions look 10x better (and feel better, too).
Let’s break it down in a way that actually makes sense. No complicated talk. Just the stuff you need to know—whether you are someone getting lashes or someone learning how to do them.
What Is Lash Mapping?
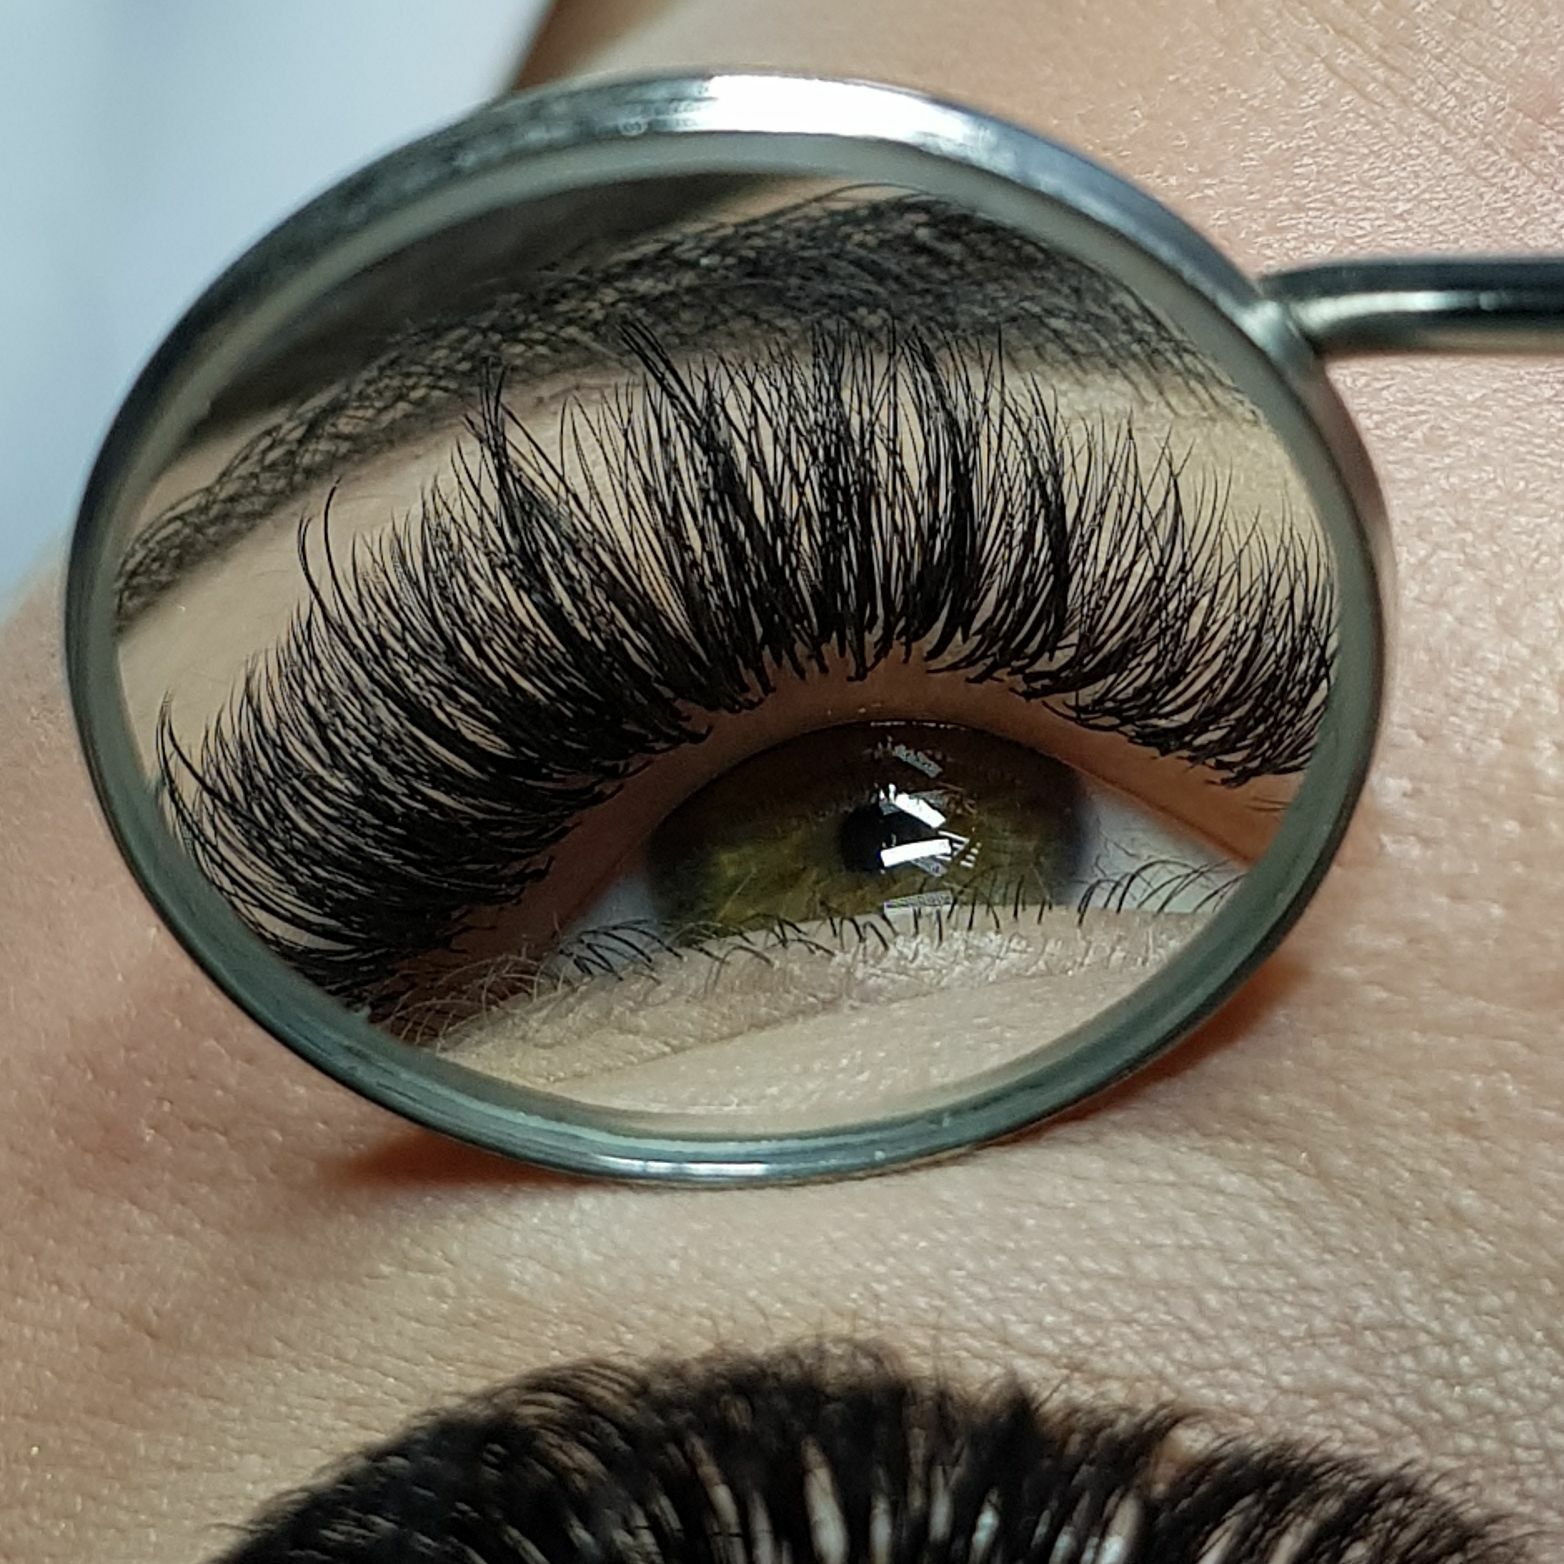
Okay, here is the deal. Lash mapping is a way for your lash artist to figure out what goes where before applying a single lash.
Your eyes are divided into sections. The artist decides what length, curl, and thickness should go in each one. All of this is based on how your eyes are shaped, what kind of look you want, and how strong your natural lashes are.
Think of it like this: your face has its own little blueprint. Eyelash mapping follows that, so your lashes look balanced and custom-made natural lash extensions. No guessing. No one-size-fits-all mess.
Why Does Lash Mapping Matter?
Because it makes a big difference, a difference can be felt by the client, and it makes the process easier and smoother for the artist.
Here is what happens without mapping:
- One eye ends up looking slightly different than the other.
- Lashes feel heavy in weird spots.
- Or the whole thing just looks “off.”
Now, here is what happens with mapping:
- The set suits your eye shape.
- It’s even on both sides.
- You get that clean, lifted, face-brightening look everyone loves.
Plus, lash mapping helps protect your natural lashes. The artist can see where to go softer or shorter so they don’t overload weak spots. (Yep—lash health matters too.)
What’s Included in a Lash Map?
A lash map usually includes:
- Lengths – Shorter near the inner corners, longer in the middle or outer sides, depending on your style.
- Curls – Some curls are soft and natural (like a C curl), while others are more dramatic (like a D curl).
- Thickness – If your natural lashes are strong, you can go thicker. If not, lighter lashes are safer.
- Eye zones – The lash line is split into zones, kind of like sections on a graph. Each one gets its own lash “plan.”
Some lash artists draw this out on under-eye pads or stickers. Others just know the zones in their head (but trust us—mapping is still happening behind the scenes).
Lash Styles, You Can Map Out
Now, this is where it gets fun – lash mapping styles.
There’s no one “right” lash style. It’s all about what fits your eyes and what kind of vibe you are going for.
Here are a few common lash map styles:
- Classic/Natural – Follows your natural lashes, just enhances them. Great for an everyday look.
- Cat Eye – Starts shorter and gets longer toward the outer edge. Makes eyes look wider or more lifted.
- Doll Eye – The longest lashes go in the center. Opens up the eyes and gives a bright, rounded effect.
- Squirrel Style – Sort of a mix between natural and cat eye. Tapered edges, but with more balance.
- Wispy or Hybrid – Random longer lashes mixed in for texture. Trendy and very Instagram-worthy.
If you don’t know what suits you, do not stress. That is your artist’s job. A good one will look at your face and guide you through it.
What Happens During Lash Mapping?
It’s not a big, dramatic process. It’s more like quiet prep work before the fun begins.
Here’s how it usually goes:
- Consultation – You talk to your artist about what kind of lashes you want. Natural? Bold? Somewhere in between?
- Eye Check – They will look at your eye shape, lid space, and natural lashes. (It’s not judging—it’s planning.)
- Choosing Products – The artist picks the curl, length, and thickness based on your goals and lash health.
- Drawing the Map – They mark your under-eye pad or mentally section out your lash lines like little dots or numbers for different zones.
- Applying the Lashes – Now comes the real work. They follow the map and adjust as they go, so everything stays balanced.
- Final Look Over – A quick check to make sure both eyes match. Maybe a few tweaks here and there.
Is Lash Mapping Only for Pros?
Short answer? No.
If you are just starting out as a lash artist, lash mapping is actually a huge help. It keeps you from winging it—and trust the professionals; “winging it” can go wrong fast.
Here are some beginner tips:
- Use pre-made templates or stickers.
- Stick to one curl at first.
- Start with basic maps like classic or cat-eye.
- Practice, practice, practice.
For pros, lash extension mapping gets more personal. They’ll combine curls and layer styles and adjust things based on what works. But it all starts with the basics. So don’t skip it.
Clients Can Tell the Difference (Even If They Don’t Know Why)
Most clients don’t walk in asking for a “lash map.” But they do walk out saying:
- “These lashes feel lighter than before.”
- “My eyes look more open.”
- “I didn’t even need eyeliner!”
That’s what a good lash map does. It makes the lashes look like they were meant for that face. Like they’re just… right.
So yes—it makes a difference. And clients can feel it (even if they don’t know what went into it).
One Last Thing…
Lash mapping is not about being extra fancy. It is about making sure every lash has a reason to be where it is.
At Lash Boutique, we don’t just glue lashes and hope for the best. We plan. We measure. We think about your face shape, lash health, and what makes you feel confident.
Every set we do is mapped just for you because it is one-size-fits-all. Not our thing.
Ready for lashes that look like they belong on your face? Book your next set with us—where every lash is placed with purpose.